What does it do?
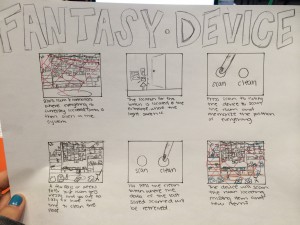
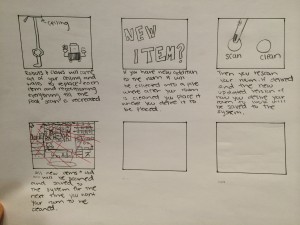
Infinitweet M[irr]O[r]OD: When the mirror detects an individual standing in front of it, it will connect to twitter with the CC3000 wifi shield and then search all of twitter newsfeed for either happy, sad , mad or love. Then the most of that emotion detected at that time, will trigger a change in the neopixel colors according to that emotion. When no individual is detected then the mirror will put on a rainbow lightshow, in a way mocking for an individual to come towards it.
My Original Idea:
Making an infinity table that will change according to what the costumer tweets it. Then the waiter will see the color of that table and come take the order of that costumer.
First time getting the neopixels to light up!
First Time Soldering:
I learned to solder my CC3000 wifi shield onto my Arduino Uno
I was really frustrated this night because my neopixels wouldn’t light up. As you can see below only a couple neopixels light up. My wiring was very unsteady. 
I had to hold the external power wiring for only 2 neopixels to light up.
Fixed my wiring and the program.The neopixel worked again after trial and error.
Started to put together my final mirror. I cut out the pieces for the new frame. Broke a mirror to decorate the outside frame of my final mirror. Applied a one way mirror to the plexiglass. You can see in the back my prototype.
My friend cracking the big mirror.
Putting on the one way mirror film.
First time seeing the infinity mirror work.
The bread board and the Arduino inside the frame.
Having the frame and neopixels all put together.
Code:
At first I tried to use temboo and connect it through twitter that way, however all the codes even at bare minimum was too big and putting it all together would definitely not be possible with the small amount of space the Ardiuno allows. So, I looked online and did a lot of research and reading and magically ended up coming across a very similar code online and just edited it to what I needed. The code basically will detect either the emotion: mad, sad, happy, or love on all the twitter feed, and once the emotion is detected it will then send it to the neopixels changing it to that color matching that emotion. It will show the emotion that comes out the most during that time.
Neopixel Twitter Color Key:
happy: yellow
sad: blue
mad: red
love: pink
Processing:
import processing.serial.*;
import twitter4j.conf.*;
import twitter4j.*;
import twitter4j.auth.*;
import twitter4j.api.*;
import java.util.*;
Twitter twitter;
String []searchString=new String[50];
//String searchString = “Happy”;
List<Status> tweets;
int count=0;
int happy=0;
int sad=0;
int love=0;
int mad=0;
int currentTweet;
int tweetpoint=1;
Serial myPort;
void setup()
{
searchString[1] = “happy+OR+sad+OR+mad+OR+love”;
String portName = Serial.list()[2]; //change the 0 to a 1 or 2 etc. to match your port
myPort = new Serial(this, portName, 9600);
size(800,600);
ConfigurationBuilder cb = new ConfigurationBuilder();
cb.setOAuthConsumerKey(“2dLMuHBRjGqN38J2icpu4XInW”);
cb.setOAuthConsumerSecret(“Dk0YEg8yuUgGZgJES46OZ2eyBPCEUkSw5BeQUEPk35f0iZsXpB”);
cb.setOAuthAccessToken(“92095119-ANeghNAMUcaIOF0icHSoRciDevbnsdSY90gtQYzeA”);
cb.setOAuthAccessTokenSecret(“Cmhsoaw7YGopAoFcQZBIAUr0RyyDjjsfBFtnSXz7QREVv”);
TwitterFactory tf = new TwitterFactory(cb.build());
twitter = tf.getInstance();
getNewTweets();
currentTweet = 0;
thread(“refreshTweets”);
}
void draw()
{
fill(0, 120);
rect(0, 0, width, height);
currentTweet = currentTweet + 1;
if (currentTweet >= tweets.size())
{
currentTweet = 0;
}
Status status = tweets.get(currentTweet);
String str = status.getText();
love = str.indexOf(“love”);
mad = str.indexOf(“mad”);
happy= str.indexOf(“happy”);
sad = str.indexOf(“sad”);
//if (status.getText()==
fill(200);
if(love>0)
{
myPort.write(‘1′);
text(“love”, random(width), random(height), 300, 200);
//text(status.getText(), random(width), random(height), 300, 200);
//text(str(love), random(width), random(height), 300, 200);
}
if(mad>0)
{
myPort.write(‘2′);
text(“mad”, random(width), random(height), 300, 200);
//text(status.getText(), random(width), random(height), 300, 200);
//text(str(mad), random(width), random(height), 300, 200);
}
if(happy>0)
{
myPort.write(‘3′);
text(“happy”, random(width), random(height), 300, 200);
//text(status.getText(), random(width), random(height), 300, 200);
//text(str(happy), random(width), random(height), 300, 200);
}
if(sad>0)
{
myPort.write(‘4′);
text(“sad”, random(width), random(height), 300, 200);
//text(status.getText(), random(width), random(height), 300, 200);
//text(str(sad), random(width), random(height), 300, 200);
}
//text(status.getText(), random(width), random(height), 300, 200);
delay(1000);
}
void getNewTweets()
{
try
{
Query query = new Query(searchString[tweetpoint]);
QueryResult result = twitter.search(query);
tweets = result.getTweets();
}
catch (TwitterException te)
{
System.out.println(“Failed to search tweets: ” + te.getMessage());
System.exit(-1);
}
}
void refreshTweets()
{
while (true)
{
getNewTweets();
println(“Updated Tweets”);
delay(30000);
}
}
Arduino:
#include <Adafruit_NeoPixel.h>
#define PIXEL_PIN 6
#define PIXEL_COUNT 74
const int analogInPin = A0;
int sensorValue = 0;
Adafruit_NeoPixel strip = Adafruit_NeoPixel(PIXEL_COUNT, PIXEL_PIN, NEO_GRB + NEO_KHZ800);
bool oldState = HIGH;
int showType = 0;
void setup() {
strip.begin ();
strip.show();
Serial.begin (9600);
pinMode (PIXEL_PIN, OUTPUT);
}
void loop() {
sensorValue = analogRead(analogInPin);
if(Serial.available())
{
if(sensorValue>=200)
{
showType=Serial.parseInt();
startShow(showType);
//delay(10);
}
else
{
startShow(0);
}
}
}
void startShow(int i) {
switch (i) {
case 0: rainbow(1); // Black/off
break;
case 1: colorWipe(strip.Color(255, 48, 48), 1); // love
break;
case 2: colorWipe (strip.Color (255, 0, 0), 1); // mad
break;
case 3: colorWipe (strip.Color (255, 100, 0), 1); // happy
break;
case 4: colorWipe (strip.Color (0, 0, 255), 1); // sad
break;
}
}
// Fill the dots one after the other with a color
void colorWipe(uint32_t c, uint8_t wait) {
for(uint16_t i=0; i<strip.numPixels(); i++) {
strip.setPixelColor(i, c);
strip.show();
//delay(wait);
}
}
void rainbow(uint8_t wait) {
uint16_t i, j;
for(j=0; j<256; j++) {
for(i=0; i<strip.numPixels(); i++) {
strip.setPixelColor(i, Wheel((i+j) & 255));
}
strip.show();
delay(wait);
}
}
// Slightly different, this makes the rainbow equally distributed throughout
void rainbowCycle(uint8_t wait) {
uint16_t i, j;
for(j=0; j<256*1; j++) { // 5 cycles of all colors on wheel
for(i=0; i< strip.numPixels(); i++) {
strip.setPixelColor(i, Wheel(((i * 256 / strip.numPixels()) + j) & 255));
}
strip.show();
delay(wait);
}
}
//Theatre-style crawling lights.
void theaterChase(uint32_t c, uint8_t wait) {
for (int j=0; j<10; j++) { //do 10 cycles of chasing
for (int q=0; q < 3; q++) {
for (int i=0; i < strip.numPixels(); i=i+3) {
strip.setPixelColor(i+q, c); //turn every third pixel on
}
strip.show();
delay(wait);
for (int i=0; i < strip.numPixels(); i=i+3) {
strip.setPixelColor(i+q, 0); //turn every third pixel off
}
}
}
}
//Theatre-style crawling lights with rainbow effect
void theaterChaseRainbow(uint8_t wait) {
for (int j=0; j < 256; j++) { // cycle all 256 colors in the wheel
for (int q=0; q < 3; q++) {
for (int i=0; i < strip.numPixels(); i=i+3) {
strip.setPixelColor(i+q, Wheel( (i+j) % 255)); //turn every third pixel on
}
strip.show();
delay(wait);
for (int i=0; i < strip.numPixels(); i=i+3) {
strip.setPixelColor(i+q, 0); //turn every third pixel off
}
}
}
}
// Input a value 0 to 255 to get a color value.
// The colours are a transition r – g – b – back to r.
uint32_t Wheel(byte WheelPos) {
WheelPos = 255 – WheelPos;
if(WheelPos < 85) {
return strip.Color(255 – WheelPos * 3, 0, WheelPos * 3);
} else if(WheelPos < 170) {
WheelPos -= 85;
return strip.Color(0, WheelPos * 3, 255 – WheelPos * 3);
} else {
WheelPos -= 170;
return strip.Color(WheelPos * 3, 255 – WheelPos * 3, 0);
}
}


